How to Transfer Data to A New iPhone? Smooth Transfer? Smooth Transfer

Introduction,
How to transfer data to a new iPhone. Although upgrading to a new iPhone is a fascinating incident, it may be a little frightening to have all your data contacts, pictures, texts, and apps moved. Fortunately, Apple offers a few ways to assurance a smooth change. This article will explain to you how to quickly transfer data to your new iPhone whether you’re upgrading to the newest version or transferring from an older model, consequently offering a variety of options based on your choices.
Table of Contents
ToggleMethod 1: Using Quick Start for Seamless Data Transfer
What is Quick Start?
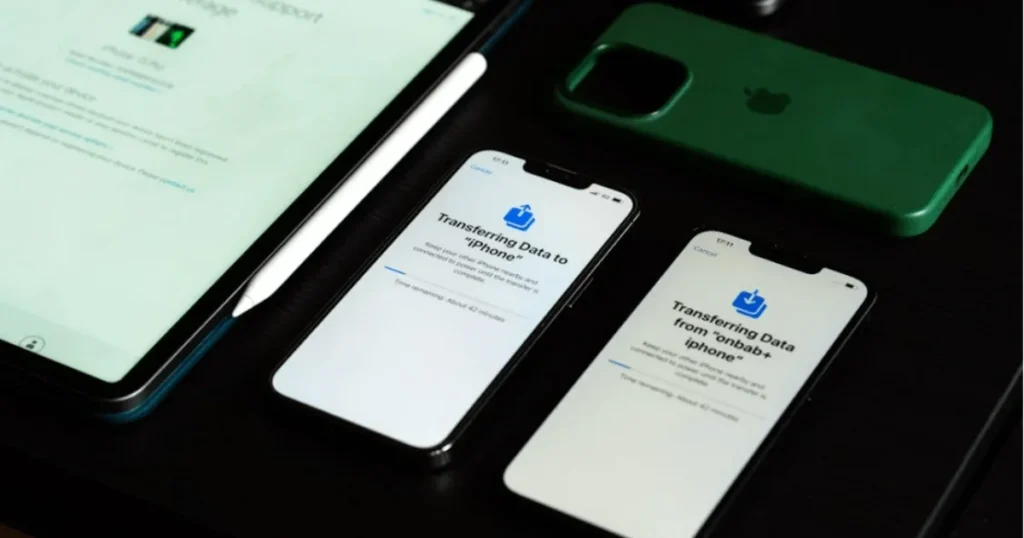
An Apple tool called Quick Start is meant to make data movement between two iPhones quick and easy. This approach uses wireless technology to move data instead of wires and outside devices, therefore removing their need. Accessible on devices running iOS 11 or higher, Quick Start lets you quickly and easily migrate your data to a new iPhone with no effort.
How to Transfer Data with Quick Start:
- Prepare Your Devices
Make sure both of your iPhones old and new run iOS 12.4 or later. Turn on Bluetooth and have both phones close by one other. - Start the Setup Process on Your New iPhone
Choose your preferred language and location, then connect to a Wi-Fi network after turning on your new iPhone. - Activate Quick Start
On your old iPhone, a Quick Start option will appear once the devices are close enough. A blue animation will show up on your new iPhone. - Scan the Animation
Use your old iPhone to scan the animation displayed on the new device. This creates a secure connection between both phones. - Authenticate the Transfer
Enter the passcode from your old iPhone on your new one to verify the transfer. - Choose What to Transfer
After that, you’ll be asked to select which data types such as contacts, apps, images, and more you wish to transfer. The transfer will start as soon as you choose. - Wait for the Transfer to Finish
It may take some time for the transfer, based on how much data you have. When finished, the information and configurations from your old iPhone will be reflected on your new one.
Quick Start’s benefits and drawbacks:
- Pros:
- Wireless transfer means no cables or additional hardware needed
- Easy and fast setup process
- Transfers all types of data, including Wi-Fi passwords and Apple Pay settings
- Cons:
- Requires both devices to be nearby
- Transfer time can vary depending on the amount of data
- It might be necessary to redownload certain programs from the App Store.
Method 2: Using iCloud for Wireless Backup and Restore
How to Back Up Your Old iPhone to iCloud:
You must back up your old iPhone to iCloud prior to relocating data to your new one. Here’s how to achieve it:
- Connect to Wi-Fi
Ensure that your old iPhone is connected to a reliable wireless network. - Check Your iCloud Storage
Ensure you have enough free storage on iCloud for the backup. If necessary, you can upgrade your iCloud storage plan. - Create a Backup
- Navigate to Settings > [Your Name] > iCloud > iCloud Backup
- Tap Back Up Now to start the backup process.
- Wait for the backup to complete. This could require a depending on the quantity of information.
Restoring Data to Your New iPhone Using iCloud:
Once the backup is ready, follow these steps on your new iPhone:
- Start the Setup Process on Your New iPhone
Set up your new iPhone, connecting to Wi-Fi and choosing your area and language.
- Use iCloud Backup to restore
Select Restore from iCloud Backup when prompted, then sign in with your Apple ID.
- Select the Latest Backup
Choose the most recent backup from your old iPhone. - Wait for the Restoration
Wait for the data to move to your new device after the restoration procedure starts. The duration it takes will based on the quantity of data and the speed at which you connect to the internet.
Common iCloud Issues and Solutions:
- Backup Not Showing Up: Verify that the backup has been finished and that you are signed in with the same Apple ID.
- Slow Transfer Speed: The procedure may be slowed considerably by a poor Wi-Fi connection. Try connecting to a faster network.
Method 3: Using iTunes or Finder for a Wired Transfer
How to Back Up Your Old iPhone Using iTunes/Finder:
If you would rather a wired method, iTunes or Finder on macOS Catalina and later enables you to support your old iPhone to a computer. How to do it:
- Connect Your iPhone to the computer
Put a USB cable to use to connect your old iPhone to your Mac. - Create a Backup
- Open iTunes (Windows/macOS Mojave and earlier) or Finder (macOS Catalina and newer).
- Select your device and click Back Up Now.
- If you want to back up sensitive data like passwords, select Encrypt iPhone backup before proceeding.
- Wait for the Backup to Complete
Wait until the backup process finishes. You can now safely disconnect the old device.
How to Restore the Backup to Your New iPhone:
- Connect Your New iPhone
Use the same USB cable to connect your new iPhone to your computer. - Restore from Backup
Open iTunes or Finder and select Restore Backup. Choose the most recent backup from your old iPhone. - Wait for the Transfer
Your new iPhone will contain the same data as your old one after the repair process is finished.
Why Use iTunes or Finder?
- Faster Transfer: Wired connections are typically faster than wireless methods.
- Full Control: You can choose which backup to restore from, providing greater flexibility.
Method 4: Using Third-Party Tools for Additional Features
For customers looking for more functionality, third-party apps like as AnyTrans, EaseUS MobiMover and Dr. Fone, provide additional choices for data exchanges. You might move. specific files from your old smartphone to your new iPhone and move information between systems like Android and iPhone using these apps’ help.
When Should You Use Third-Party Apps?
- If you are changing from Android to iPhone.
- If your old iPhone is damaged and you need advanced recovery options.
- If you need to move specific data (such as just photos or videos) across devices.
Popular Third-Party Apps:
- AnyTrans
A versatile app for transferring everything from contacts to apps. It also allows transferring data between iPhones and Android devices. - Dr. Fone
Well-known for its powerful data recovery characteristics, Dr. Fone additionally backs transferring data between iPhones and other devices. - The EaseUS MobiMover
You can move contacts, music, and photographs from your old iPhone to another one with this simple to-utilize program.
Tips for a Smooth Data Transfer Process
- Ensure Compatibility
Ensure both your old and new iPhones are suitable with the transfer technique you’re using. - Update iOS
Ensure both devices are running the latest version of iOS to avoid compatibility issues. - Backup First
Always back up your old iPhone before starting the transfer process. - Verify the Transfer
After the transfer, check your new iPhone to ensure all data has been successfully moved.
Final Thought
How to transfer data to a new iPhone. It doesn’t have to be challenging to move info to a new iPhone. Quick Start, iCloud, iTunes, and apps from third parties are just a some of the methods Apple offers to simple and easy the process. You may swiftly get back to work using your new iPhone after moving your data, whether you choose to use a WiFi or cable.
Your apps will be moved when you use iCloud or Quick Start, but you might need to download them again from the App Store. If you back up your apps in the process, iTunes/Finder will transfer them directly.
Contacts, images, music, and other data types can be transferred selectively when utilizing third-party apps like AnyTrans or Dr. Fone. All data types are automatically transferred by iCloud and Quick Start.
Using your new iPhone during the transfer process is not advised. Even though iCloud and Quick Start operate in the background, using the device could cause the transfer to lag.
You can still move your data to a new iPhone by logging into your Apple ID if you’ve configured iCloud backups and enabled iCloud syncing for your most important data (contacts, images, and messages).
Yes, applications and app data are usually transmitted when utilizing iTunes, iCloud, or Quick Start. However, after installing some apps, you might need to change some settings or log back in.
Try rebooting both devices if the transfer freezes. If the problem continues, make sure your devices are linked to a reliable Wi-Fi network (for iCloud and Quick Start) or, if you’re using iTunes/Finder, check the USB cord. You can also restart both devices and try the process again.


Earlier I thought differently, many thanks for the information.
Thank you for any other great post. Where else may anybody get that type of info in such a perfect means of writing? I’ve a presentation subsequent week, and I am on the search for such information.