
How to Format a Disk Using PowerShell Avoid Data Loss in 2026
Format a disk using PowerShell. Since formatting removes all of the data in one quick step, formatting one of the greatest hard drives or SSDs is equivalent to purchasing a new hard disk. External and internal storage media can be cleaned in a hard drive format.
Table of Contents
ToggleFormat a disk using PowerShell. We go over how to use PowerShell to format a hard drive in this lesson. To avoid data loss, make sure you backup all of your accessible data before continuing. To format a drive, take the following actions:
STEP 1: Open Windows PowerShell as Administrator

Opening the command prompt.
Find the Windows PowerShell by searching, then select Run as Administrator from the menu.
STEP 2: Use Diskpart
Format a disk using PowerShell. Hard drive, partition, and volume administration are possible with Diskpart, a potent command-line tool that comes with Windows PowerShell. It enables users to utilize the command line to carry out several disk-related tasks, including assigning drive letters, formatting drives, and making partitions.
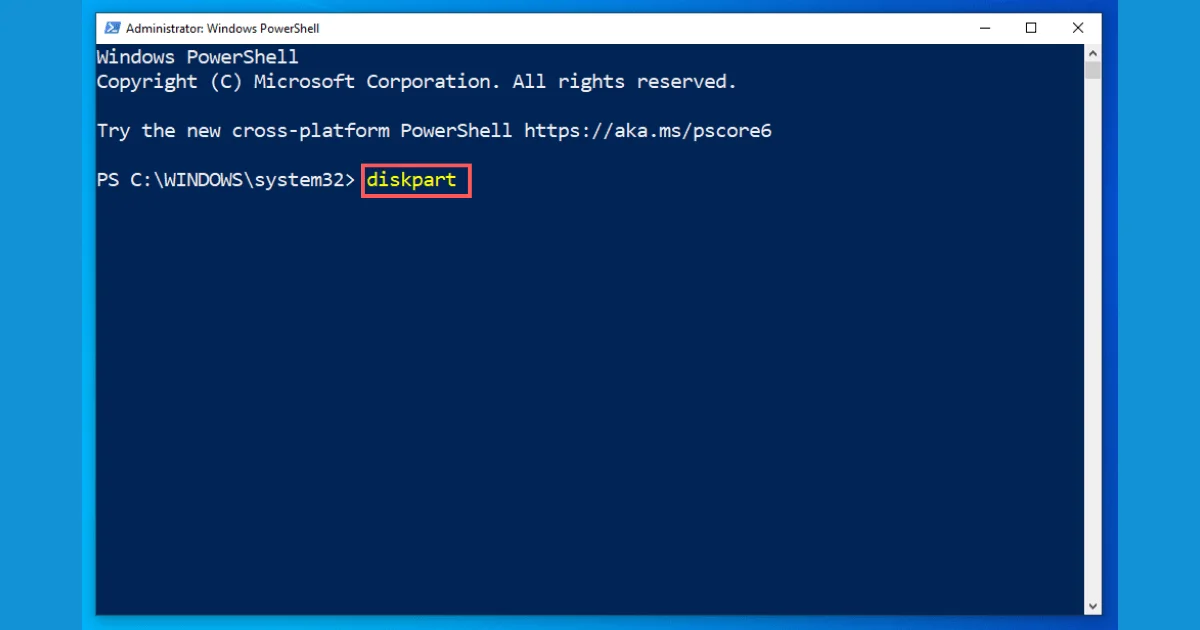
Using diskpart
Once the PowerShell is open, type ‘diskpart’ and press Enter.
STEP 3: Type List Disk
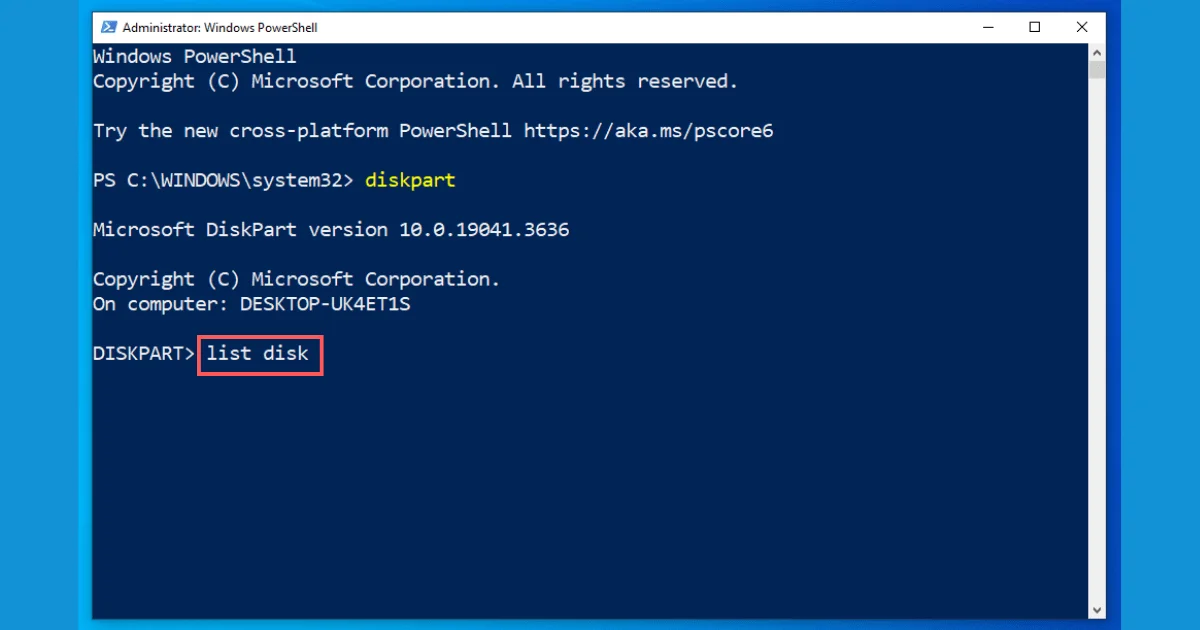
Using list disk
The PowerShell “Open” above will launch a Diskpart window. Enter ‘list disk’ into this window and hit Enter. Every available drive will be listed.
STEP 4: Select the Drive to Format
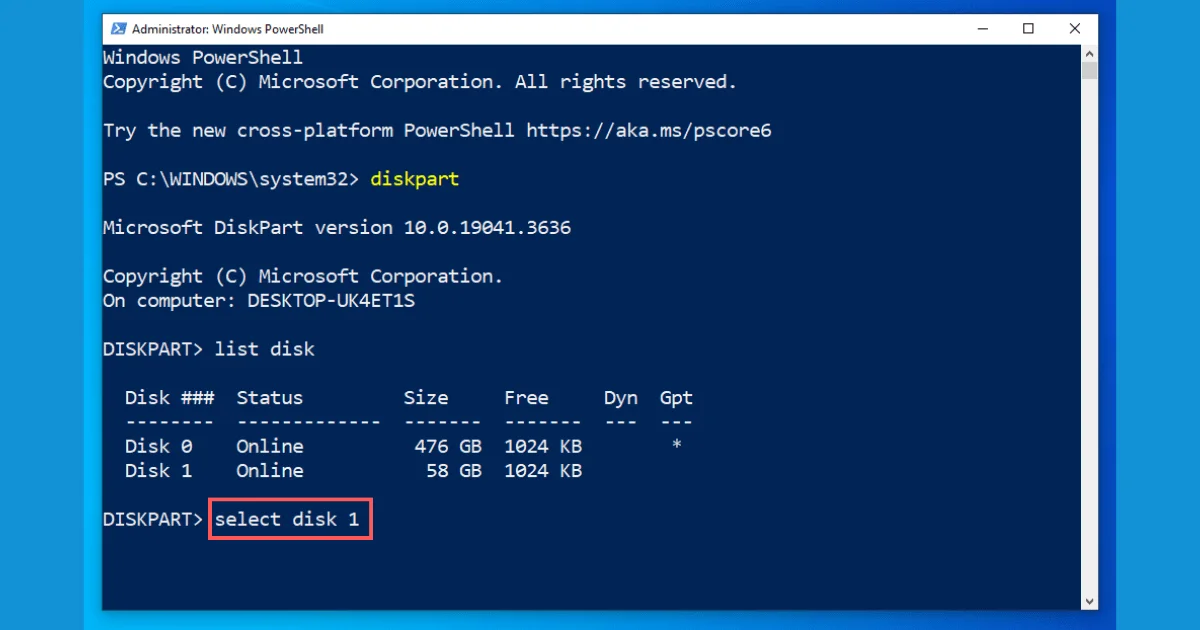
Formatting a drive.
Now type ‘select disk (disk number)‘ as previously displayed. Indicate which drive needs to be formatted.
STEP 5: Clean the Disk
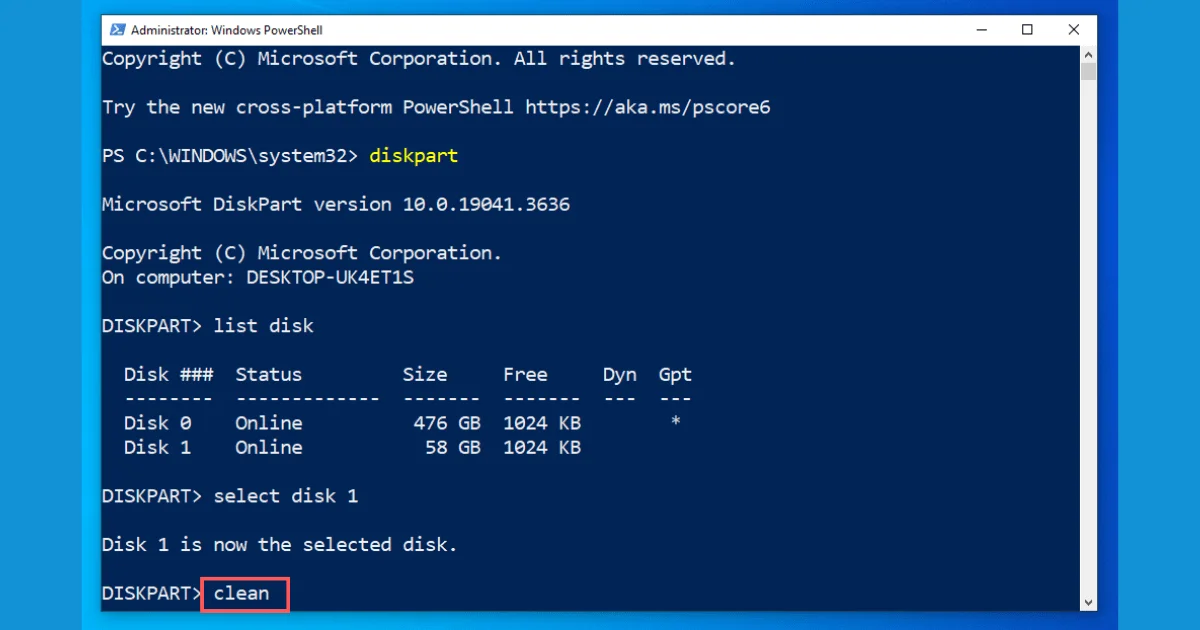
Using the clean function.
Type ‘clean’ in this step. This command will successfully clean up the drive and permanently remove all files and folders.
STEP 6: Create Partition Primary
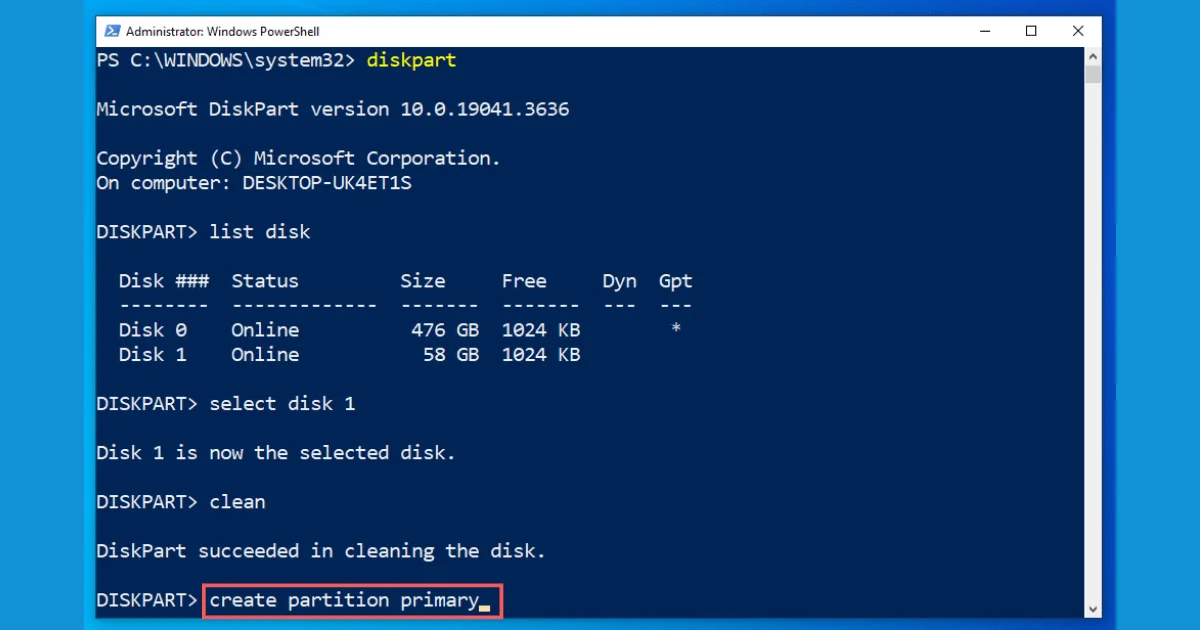
Creating primary partition.
Type ‘create partition primary’ to restore drive accessibility.
STEP 7: Select the Partition
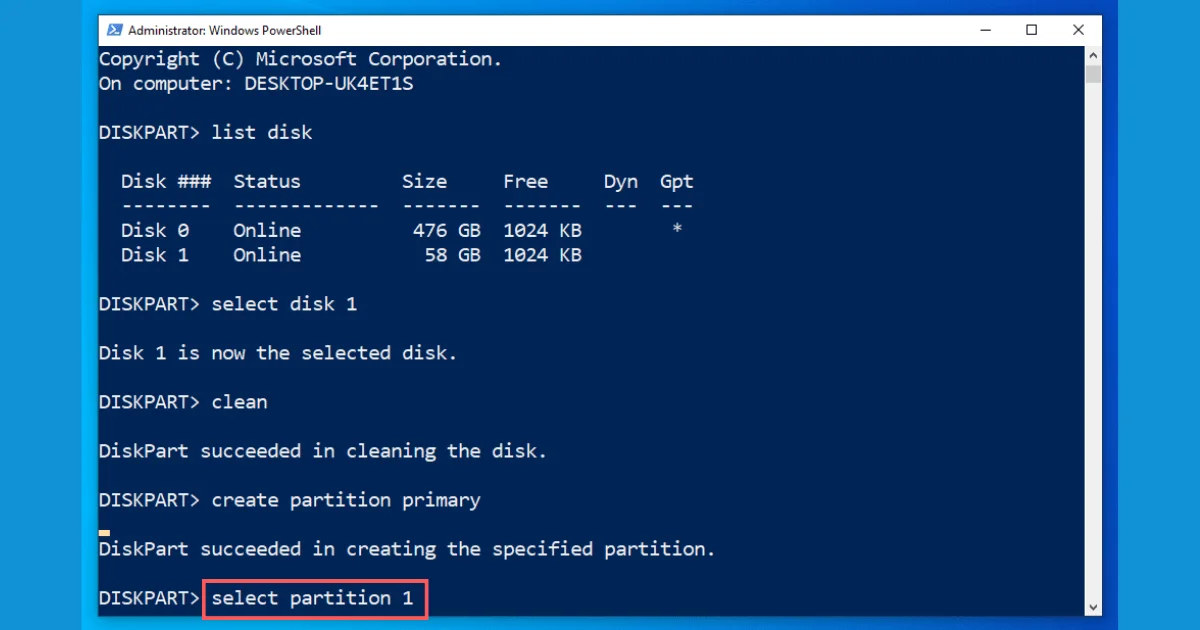
The Partition Select
Type ‘select partition 1’ for the activated partition and hit enter.
STEP 8: Active the Partition
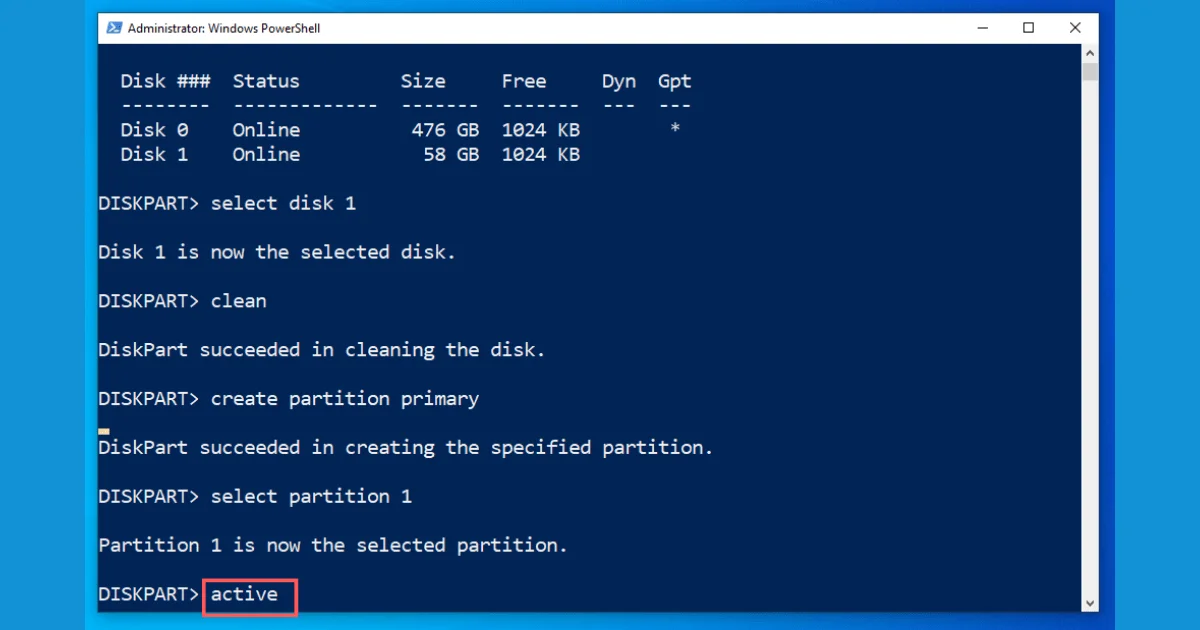
The Partition active
Type ‘Active’ and hit enter for the activate partition.
STEP 9: Format the Drive
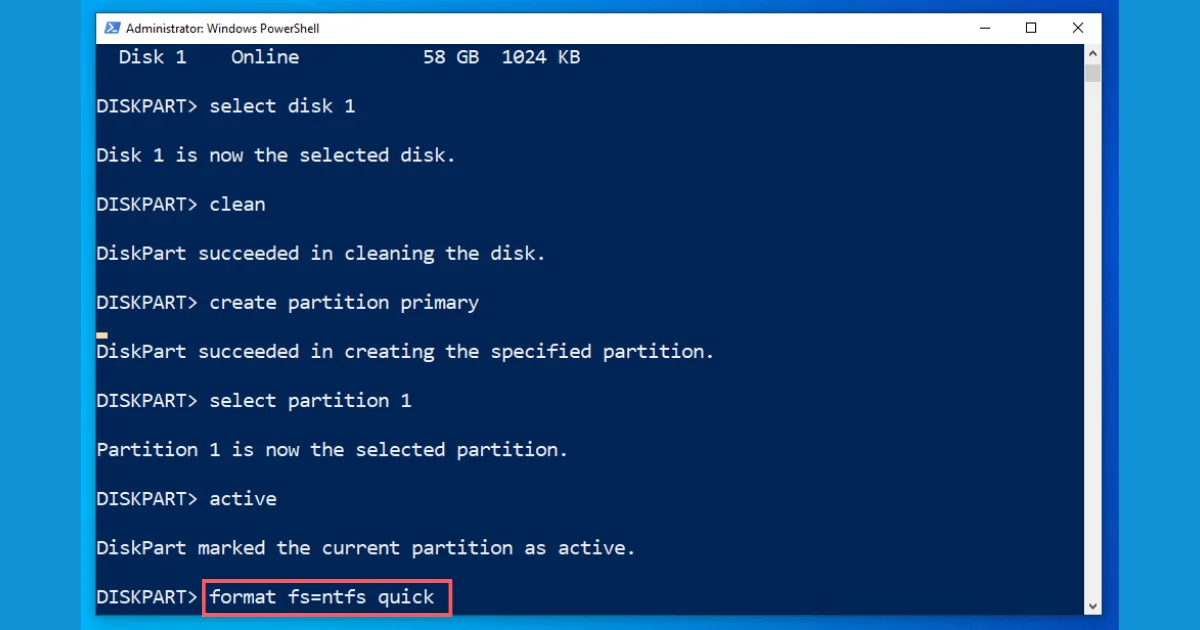
Formatting a drive.
Now use the FAT or NTFS file system to format the drive. Input ‘format fs=ntfs quick’ and hit Enter.
STEP 10: Assign a Drive Letter
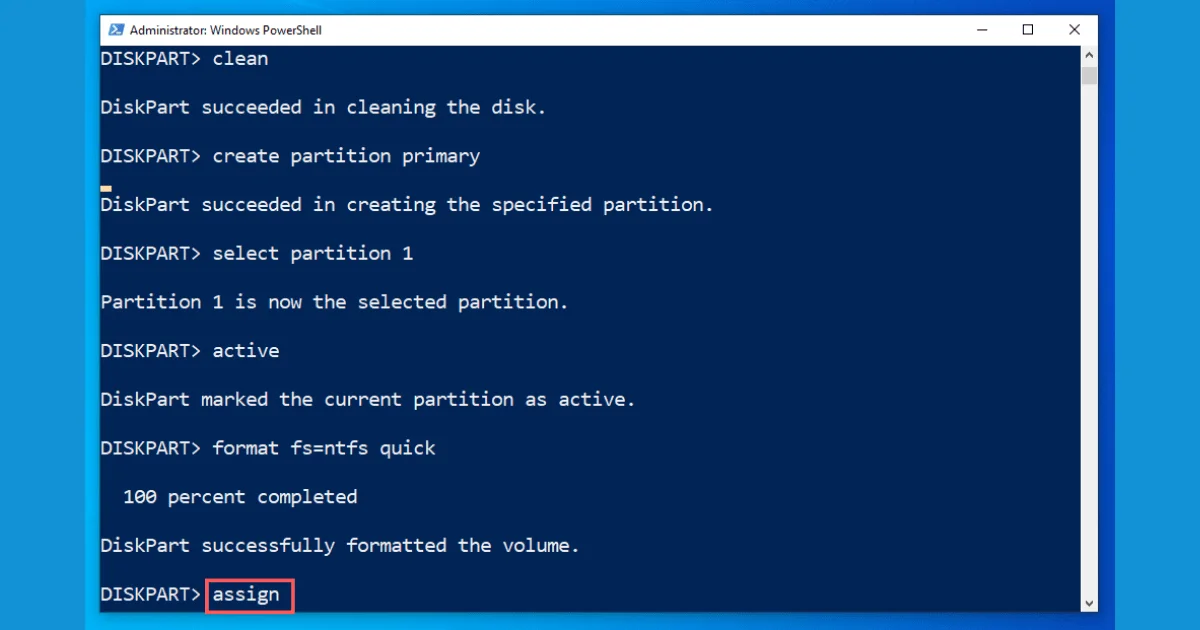
Assign a drive letter.
You can type ‘assign’ as demonstrated below to assign a drive letter.
STEP 11: Exit from the PowerShell
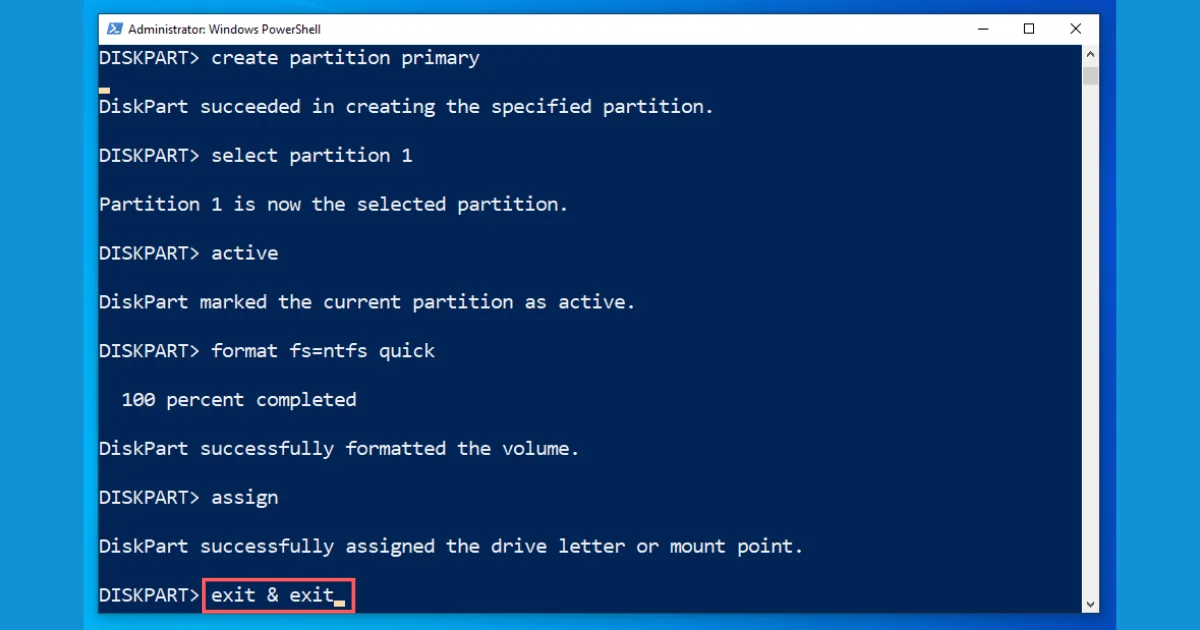
Exit PowerShell
You can type ‘exit’ for the exit from PowerShell.
Final Thoughts Format a disk using PowerShell
Format a disk using PowerShell. When done correctly, formatting a disk with PowerShell can be a simple and effective procedure. Disk formatting is made less intimidating and more doable by PowerShell’s flexibility, automation, and control. To guarantee a seamless formatting experience, always proceed cautiously, back up crucial data, and adhere to best practices.
FAQs
Format a disk using PowerShell. Format-Volume -DriveLetter D -FileSystem NTFS -Confirm:$false
Clear-Disk -Number 1 -RemoveData -Confirm:$false
Format-Volume -DriveLetter E -FileSystem FAT32 -Confirm:$false
Use the Format-Volume cmdlet with appropriate parameters.
Get-Disk | Format-Table -Property Number, FriendlyName, Size, MediaType


Your article helped me a lot, is there any more related content? Thanks!